Instruments and Music
VerkLabs can make music as well as pictures. You build an instrument out of nodes, in the same kind of node editor you use for shaders, and play it from a Music track on the Runsheet: a single note, a chord, or a whole melody that you draw in a piano roll or bring in from a MIDI file. The sound is made live in your browser, so it follows the tempo, reacts to the project’s parameters, and can drive the visuals in the same project.
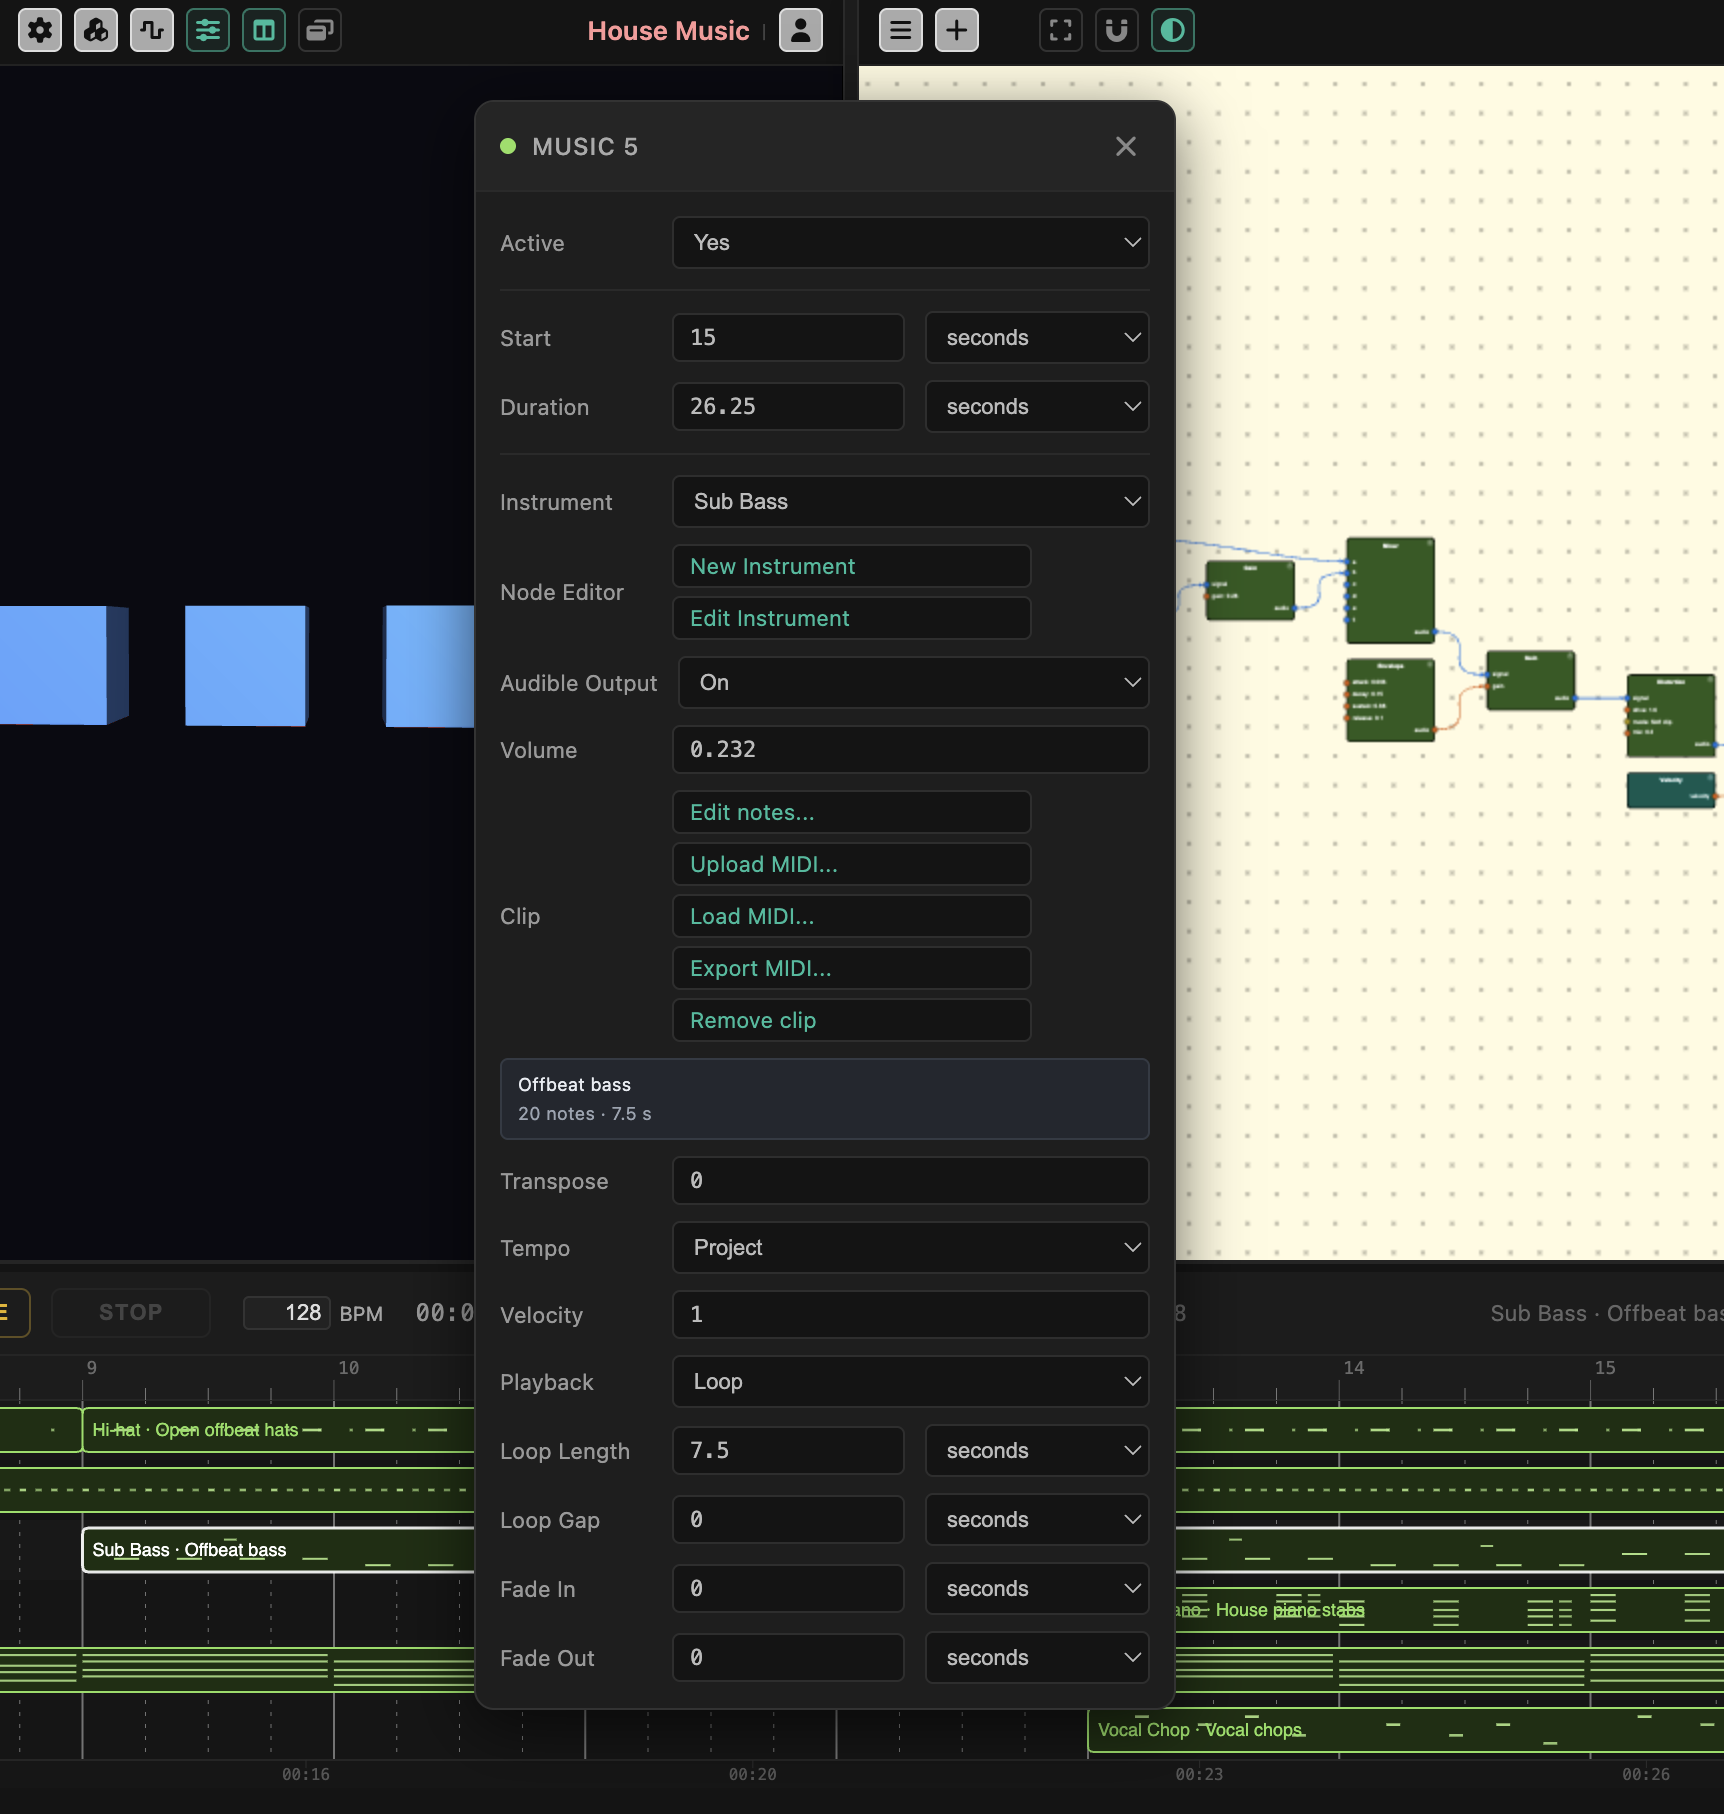
Four ideas are enough to start:
- An instrument is a small node network that turns a note into sound. You choose one from the built-in Library, or build your own.
- A Music event on the Runsheet plays an instrument. It plays either one Note (or a chord), or a note clip – a list of timed notes.
- Every note is played by its own copy of the instrument, so a chord is several copies, and a fast melody is many.
- The sound starts when the Audio button is on, like all sound in the project (see Media Bar).
Your First Sound
- Click Manage Instruments in the Canvas Top Bar (it is also in the Drop-Down Menu, as Instruments…).
- Click Library…, find Piano, click Preview to hear it, and click Add. The piano is now in your project (Preview turns the sound on for you).
- In the Runsheet, add a Music track with +Track, then double-click an empty spot on it and choose Add Music.
- Double-click the new event to open its inspector, and choose Piano as the Instrument.
- Type C4 E4 G4 in the Note field. Press START on the Runsheet. You hear a C major chord, repeating for as long as the event lasts.
Change Note to Cmaj7, A3, or a number (60 is middle C), and start again. To play a tune instead of a chord, read on: Note Clips and the Piano Roll.
The Instruments Window
Click Manage Instruments in the Canvas Top Bar (or choose Instruments… in the Drop-Down Menu) to open the Instruments window, which lists the instruments in your project and how many events use each.
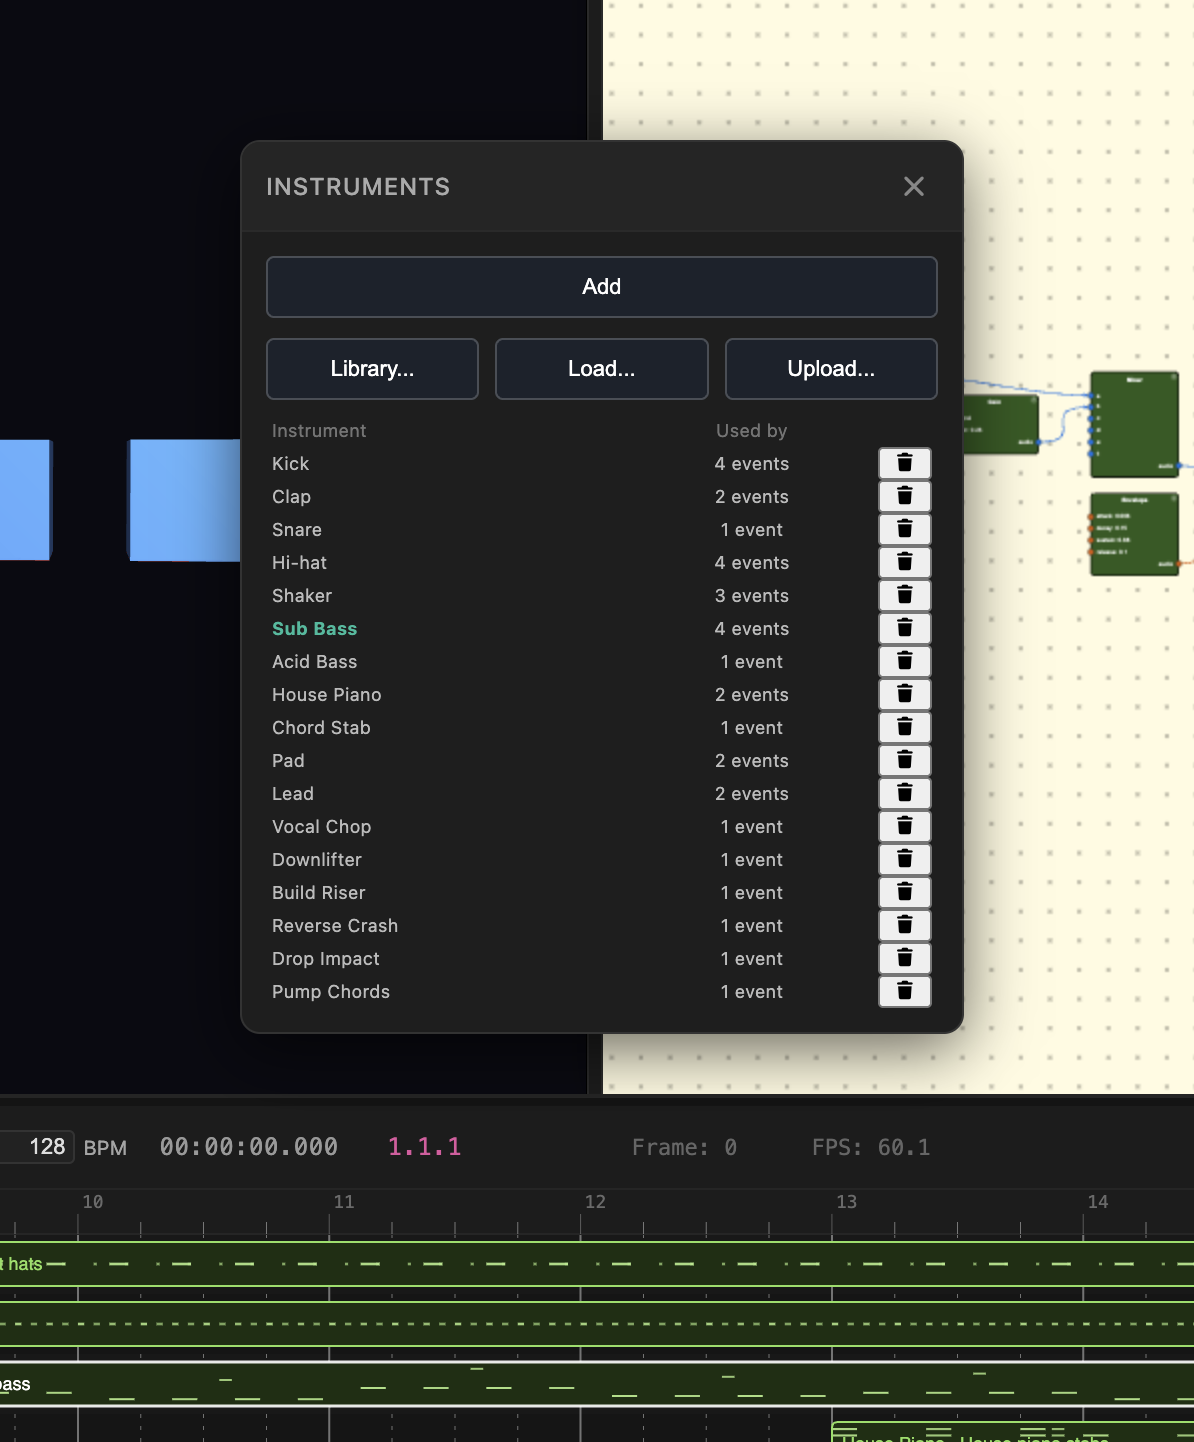
- Add makes a new, empty instrument and opens it in the node editor.
- Library… opens the built-in library (see The Instrument Library).
- Load… adds an instrument from your own files, or one that was shared with you (see Saving and Sharing Instruments).
- Upload… adds an instrument from a file on your computer.
- Click an instrument’s name to open it in the node editor. The trash button deletes it; events that used it are left without an instrument.
An instrument belongs to the project, and is saved with it.
The Instrument Library
The Library has more than sixty ready-made instruments, grouped by kind: drums, keys, guitars, basses, strings, brass, woodwinds, voices, synths, percussion, and effects. Type in the search box to filter them, click Preview to hear an instrument play its demo note or chord, and click Add to put a copy in your project. Adding an instrument twice gives you two copies (Piano and Piano 2) that you can change independently.
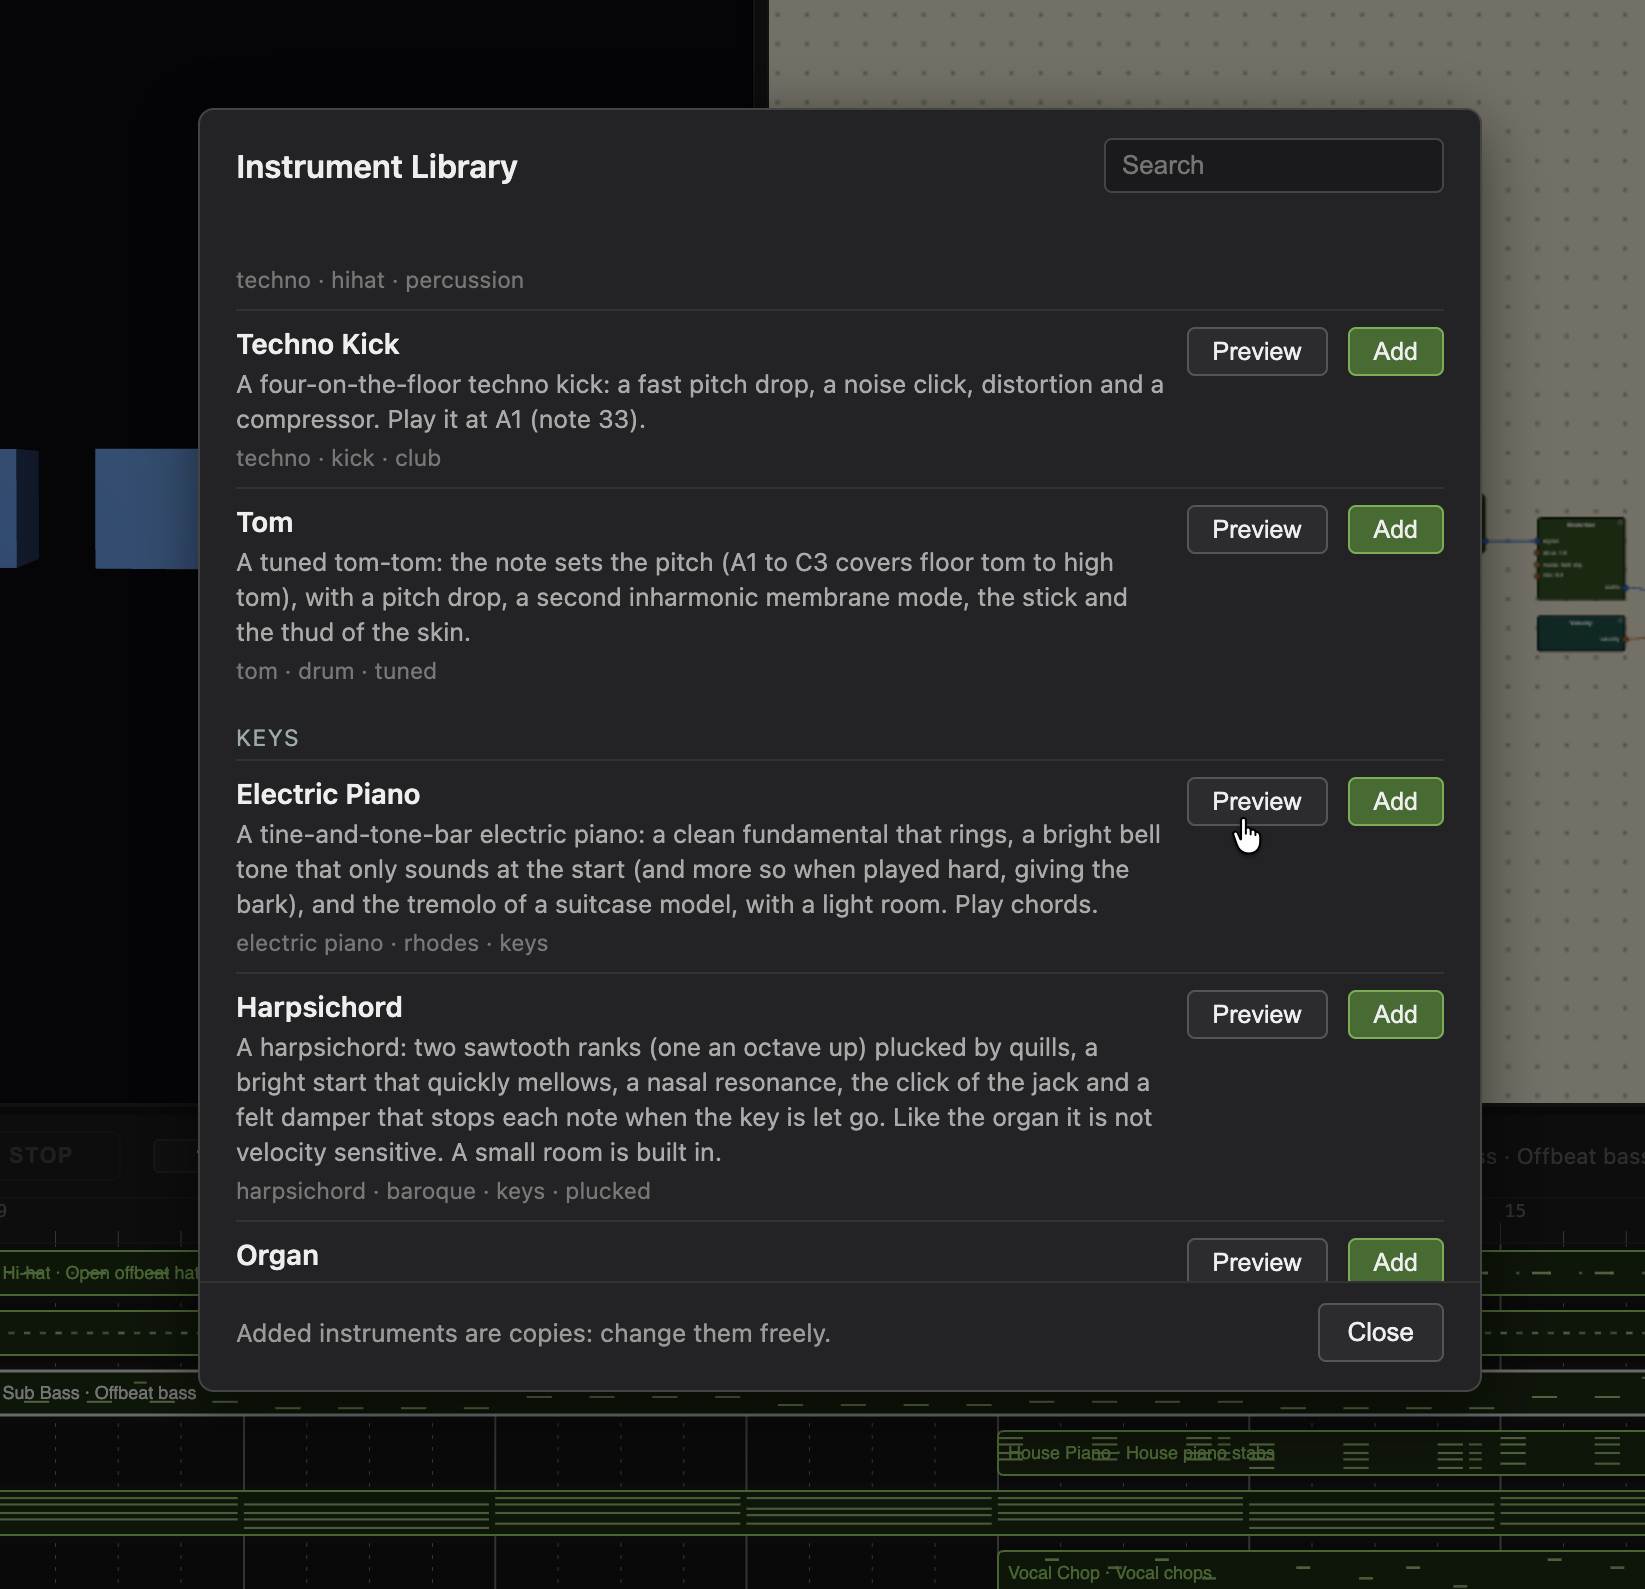
Each entry says what it is and how to play it: for example, that the Tom is tuned by the note you give it, that the Build Riser needs a note at least fourteen seconds long, or that the Pump Chords should be played again on every beat. Read the description of anything you add. The instruments in the Effects group work differently: they listen to other tracks instead of playing notes (see Instruments That Process Other Tracks).
Playing an Instrument from the Runsheet
A Music event is set up in its inspector, like other Runsheet events (see Runsheet). The fields that are specific to it:
- Instrument – which instrument plays. (none) leaves the event silent.
- New Instrument – makes a new, empty instrument, opens it in the node editor, and uses it in this event. Edit Instrument opens the one the event uses.
- Note – the note or notes to play: a name (C4, F#3, Bb2), a number (60 is middle C, 69 is A4 at 440 Hz), a list (C4 E4 G4) or a chord symbol (Cmaj7, F#m7). A chord plays every note at once.
- Velocity – how hard the notes are played, from 0 to 1. Instruments can make harder notes louder, brighter, or both. The library instruments do.
- Audible Output, Volume, Playback, Loop Length, Loop Gap, Fade In and Fade Out – as for any event that plays over time (see Runsheet). With Loop on, the note plays again on each repetition, which makes a steady pulse: a one-beat Loop Length with a kick drum gives you four on the floor.
Note Clips and the Piano Roll
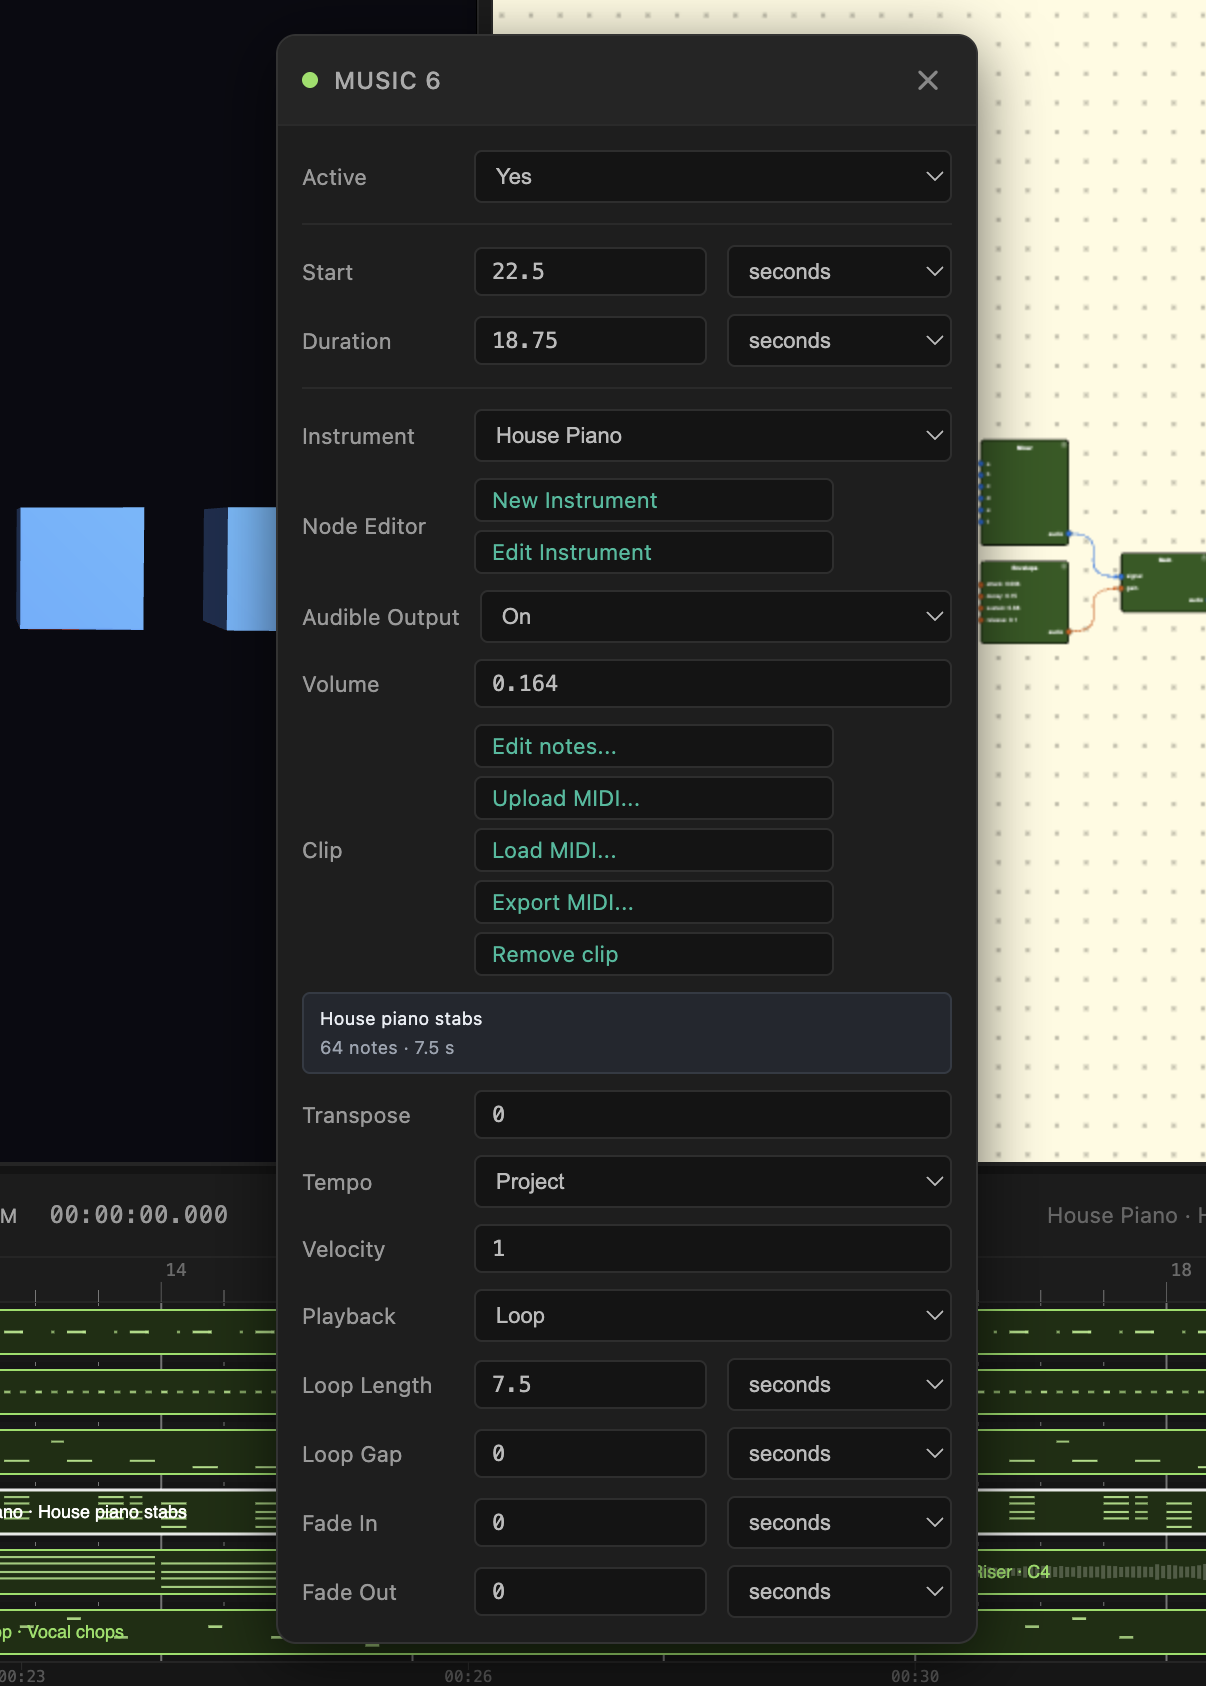
A note clip is a list of notes with their start times, lengths, pitches and velocities, stored in the event. It is how you play a melody or a drum pattern rather than a single chord. There are three ways to get one:
- Create clip… turns the event’s Note into a one-bar clip (a chord becomes notes played together at the start of the bar, one beat long) and opens the piano roll, where you add the rest.
- Upload MIDI… or Load MIDI… fills the clip from a MIDI file (see MIDI Files).
- Add Music from MIDI on a Music track’s right-click menu makes a new event from a file.
Once an event has a clip, its inspector shows Edit notes…, Upload MIDI…, Load MIDI…, Export MIDI… and Remove clip. The clip’s length is the loop length, so with Loop on it repeats. Two more fields are specific to clips:
- Transpose – moves every note up or down by semitones (from −48 to 48), without touching the clip.
- Tempo – File plays the clip at the tempo it was made at (a MIDI file’s own tempo, including tempo changes). Project makes it follow the project’s BPM, so changing the BPM speeds the melody up or slows it down with everything else. Clips you create yourself are set to Project.
The Piano Roll
Click Edit notes… to open the piano roll, a floating window with the notes of the clip laid out on a piano keyboard.
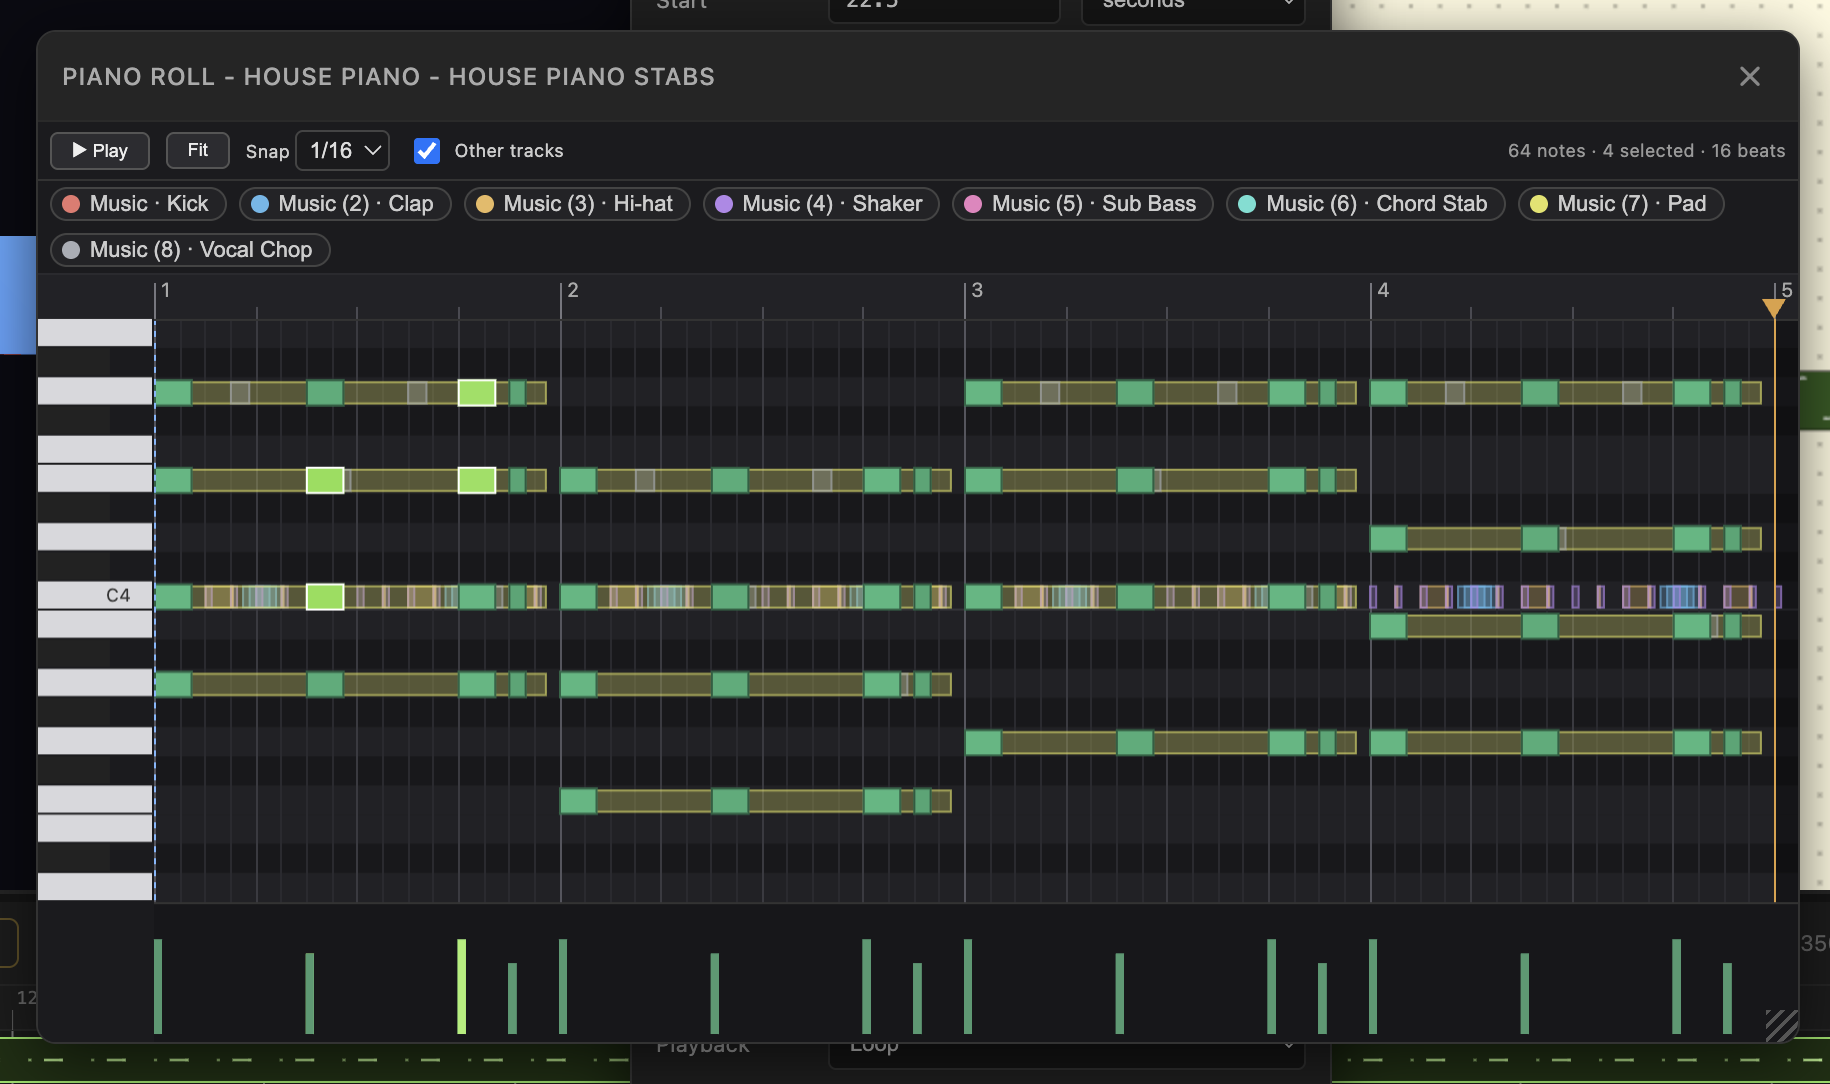
The keyboard is on the left, the time ruler (bars and beats) along the top, and the velocity lane along the bottom, with one bar per note.
Editing notes
- Double-click an empty spot to add a note there. It gets the length of the last note you made, or one grid step.
- Click a note to select it, Shift-click to add to the selection, or drag on empty space to select everything inside a box.
- Drag a note to move it in time and pitch. Drag its right edge to change its length.
- Drag a bar in the velocity lane to change a note’s velocity.
- Drag the amber marker on the ruler to change the length of the whole clip.
- Delete removes the selected notes.
With the keyboard
- Left and Right move the selected notes by one grid step, Up and Down by a semitone (with Shift, by an octave).
- Ctrl/Cmd+A selects all, Ctrl/Cmd+D duplicates the selection to just after it, and Ctrl/Cmd+C and Ctrl/Cmd+V copy and paste at the dashed cursor line. (Click on the ruler, or on an empty spot in the grid, to move the cursor.)
- Space starts and stops playback. Esc closes the piano roll.
Hearing it
- Click a key to hear that pitch. A note you add or move sounds as you place it.
- ▶ Play (or Space) plays the clip from the dashed cursor line, with the instrument of the event. The playhead moves along, and the keys of the notes that are sounding light up. Playing the Runsheet while the piano roll is open lights them too.
The view
- Snap sets the grid to a quarter, eighth, sixteenth or thirty-second beat, or Off. It applies to placing, moving and resizing notes.
- Fit zooms to show all the notes.
- Ctrl/Cmd and the mouse wheel zoom in time, Alt and the wheel zoom in pitch, and the wheel alone scrolls the pitch (hold Shift, or scroll sideways, to scroll in time).
- Other tracks shows the notes of your other Music events faintly behind this one, each track in its own color, so you can write a melody that fits the chords. Click a track’s chip to show or hide it. The keys of those notes light up too, in their track’s color, while they play.
Every edit can be undone with the normal Undo. The piano roll changes what the Runsheet plays right away, even while it is running.
MIDI Files
MIDI is the standard file format for notes: a MIDI file holds the notes of a song, one track for each part, but not the sound, which is why you choose an instrument for each track. MIDI files from the internet, from a notation program or from a keyboard recording all work.
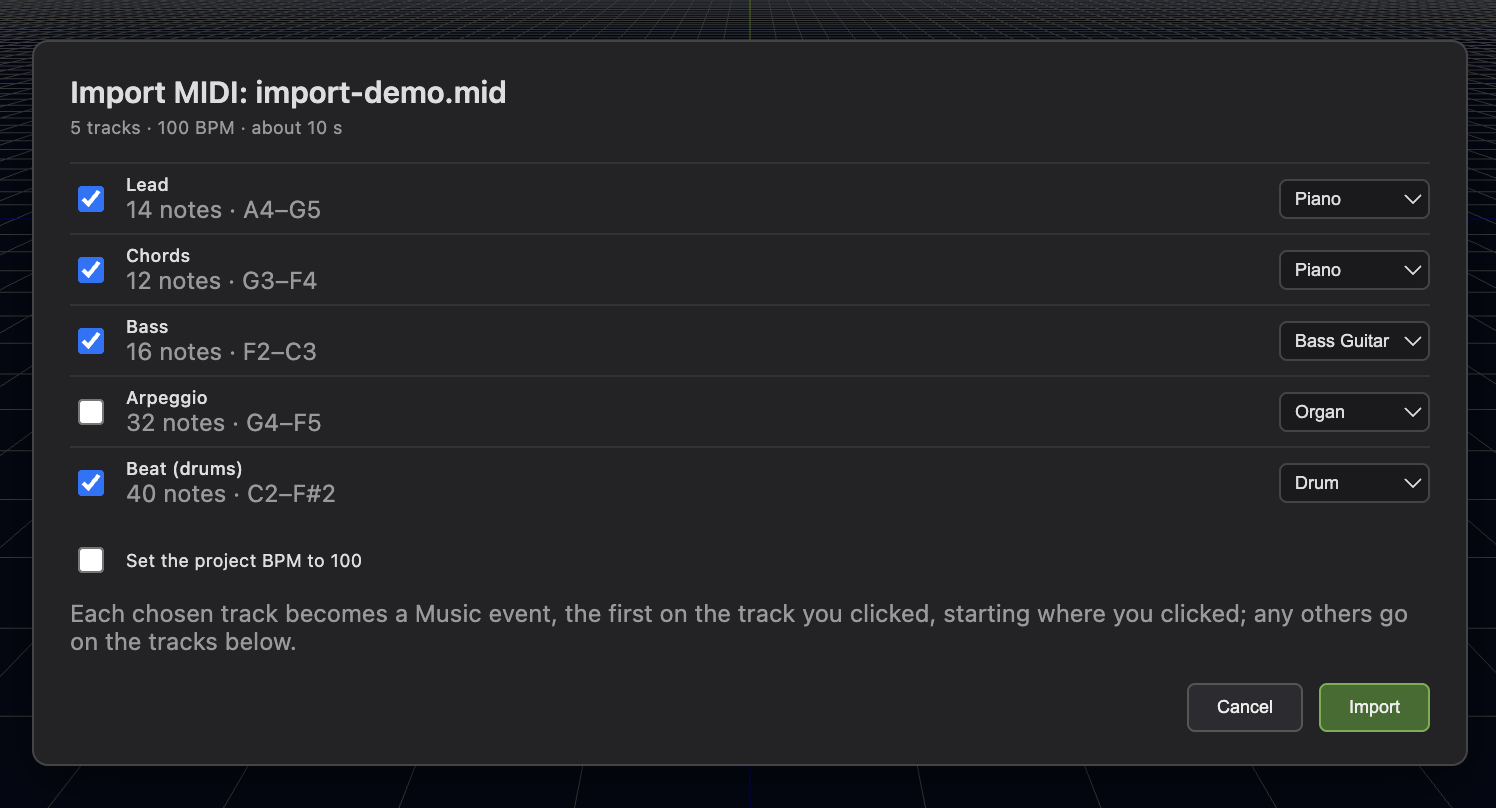
To bring one in, use Upload MIDI… (a file on your computer) or Load MIDI… (a file in your own storage, see below) in a Music event’s inspector, or Add Music from MIDI / Add Music from stored MIDI… on a Music track’s right-click menu. The Import MIDI dialog then shows the tracks in the file, with their number of notes and range:
- Tick the tracks you want, and choose an instrument for each.
- Set the project BPM to … copies the file’s tempo into the project.
- Every ticked track becomes its own Music event with a note clip: the first on the event or the track you started from, the rest on the tracks below.
The notes are copied into the project. Nothing keeps a link to the file afterwards.
To take music out again, use Export MIDI… on an event with a clip. Download as a MIDI file saves it to your computer, and Save to my files… puts it in your own storage.
Building an Instrument
Add in the Instruments window, New Instrument in a Music event, or a click on an existing instrument opens the instrument editor. It is the node editor you know from shaders, in instrument mode: the Add Node menu lists the instrument nodes, and there is no object to configure. Nodes connect with gray wires for sound, and orange wires for control values.
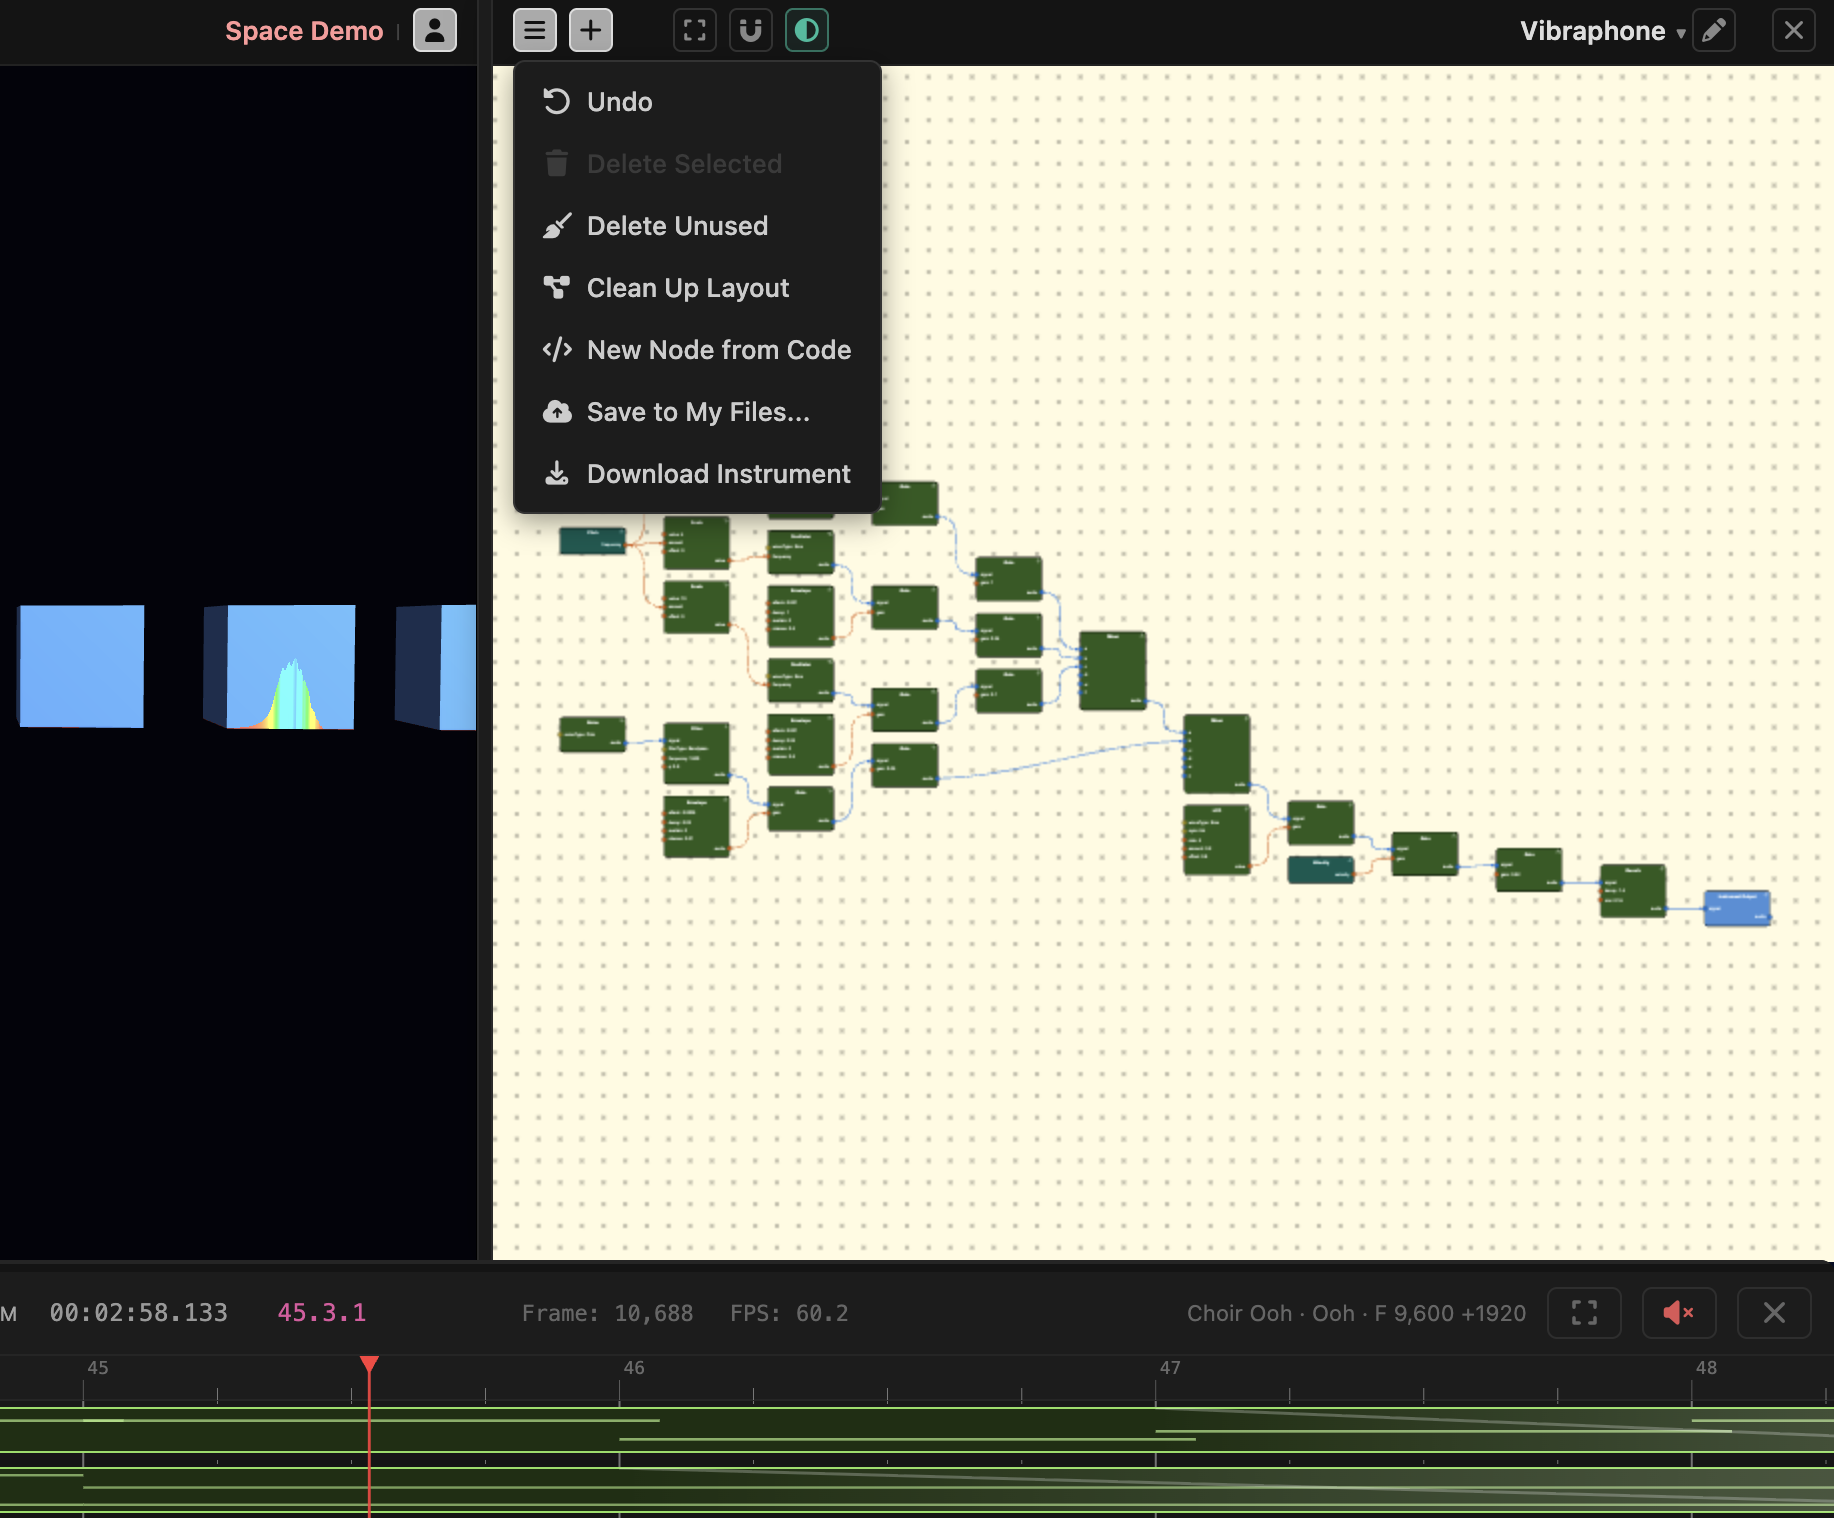
Every instrument ends at one Instrument Output node. Only what is connected to it makes sound. A simple instrument has three parts:
- A source – an Oscillator (a tone: sine, square, sawtooth or triangle) or a Noise node (for drums, breath and wind).
- A shape over time – an Envelope into a Gain: it starts silent, rises during the Attack, settles to the Sustain level, and fades away over the Release when the note ends.
- Some character – a Filter to make it duller or brighter, and effects such as Delay, Reverb, Distortion or Pan.
Where a note comes in, use the nodes in the Notes section of the Inputs menu: Pitch gives the frequency of the note, in Hz, ready to wire into an oscillator’s Frequency; Note gives the note number; and Velocity gives how hard it is played. A chord plays one copy of the instrument per note, and each copy has its own pitch and velocity. The Sequencer steps through a pattern of notes by itself.
The Math nodes, the Scale node and the LFO node let you connect things to each other: an envelope to a filter, an LFO to the pitch for vibrato, or the velocity to the brightness. An LFO set to Beats follows the project’s BPM.
To make an instrument respond to the rest of the project, use a Param node to read a parameter that the Runsheet sets (see Params in Runsheet), so a filter can open when a Params event says so.
The editor’s burger menu has Undo, Delete Selected, Delete Unused, Clean Up Layout (arranges the nodes from left to right with as few crossings as possible) and New Node from Code. For an instrument it also has the storage items described below.
Trying It
You can edit an instrument while a Runsheet plays. Notes that are already sounding finish with the old version, and every new note uses the new one. To hear a change without starting the Runsheet, click a key in the piano roll.
Sounds That Work Well
- Drums are mostly a fast falling pitch (for a kick or tom), or noise through a filter with a very short envelope (for a snare or hi-hat).
- A long, quiet ring is two envelopes added: a quick first drop and a slow tail. That is what makes a piano or guitar string.
- A note that gets brighter when it is played harder comes from wiring Velocity into the filter’s Frequency.
Look at the library instruments for examples: add one, open it in the editor, and see how it is made.
Keeping It Light
Every note is a separate copy of the instrument, so a fast, busy part with a heavy instrument can be too much for the browser. Two habits help:
- Put a Reverb as the last node, straight into Instrument Output, with a fixed Decay and Mix. The reverb is then shared by all the notes of the Music event, and costs one instead of one per note. A reverb in the middle of an instrument, or one that is controlled by another node, is built again for every note, and that adds up quickly.
- Prefer a few nodes to many, and shorter releases and tails.
If the browser cannot keep up, VerkLabs fades out the notes that have been ringing the longest, and the browser console says the audio thread is falling behind. If you hear notes disappearing in a busy passage, that is what is happening; simplify the instrument or the part.
Instruments That Process Other Tracks
An instrument can listen to other Music or Audio tracks instead of, or as well as, playing notes. The Runsheet Track node brings the sound of a track into the instrument, where it can be filtered, given echo or reverb, or squashed by a pumping volume. The Microphone node does the same with the live microphone (use headphones, or it will howl).
The Effects in the library work this way. Reverb Bus and Delay Bus put one room or one echo around several tracks at once, Lo-Fi Bus gives them an old-tape sound, and Sidechain Pump ducks them on every beat like a dance track. To use one:
- Give the bus its own Music event (it plays no notes; only its nodes matter), starting on a bar line and as long as the tracks it processes, with the same Loop Length.
- Set the tracks it listens to (the ones in its Runsheet Track nodes; the library buses use Music 2, 3 and 4, and you change them in the nodes) to Audible Output: Muted, so that you hear only the processed sound.

Saving and Sharing Instruments
An instrument can be kept in your own files, and shared, like a project or an image. It is stored as a file of the type Instrument in the Storage Directory, and it follows the same rules as everything else there: private, public, or shared with named people.
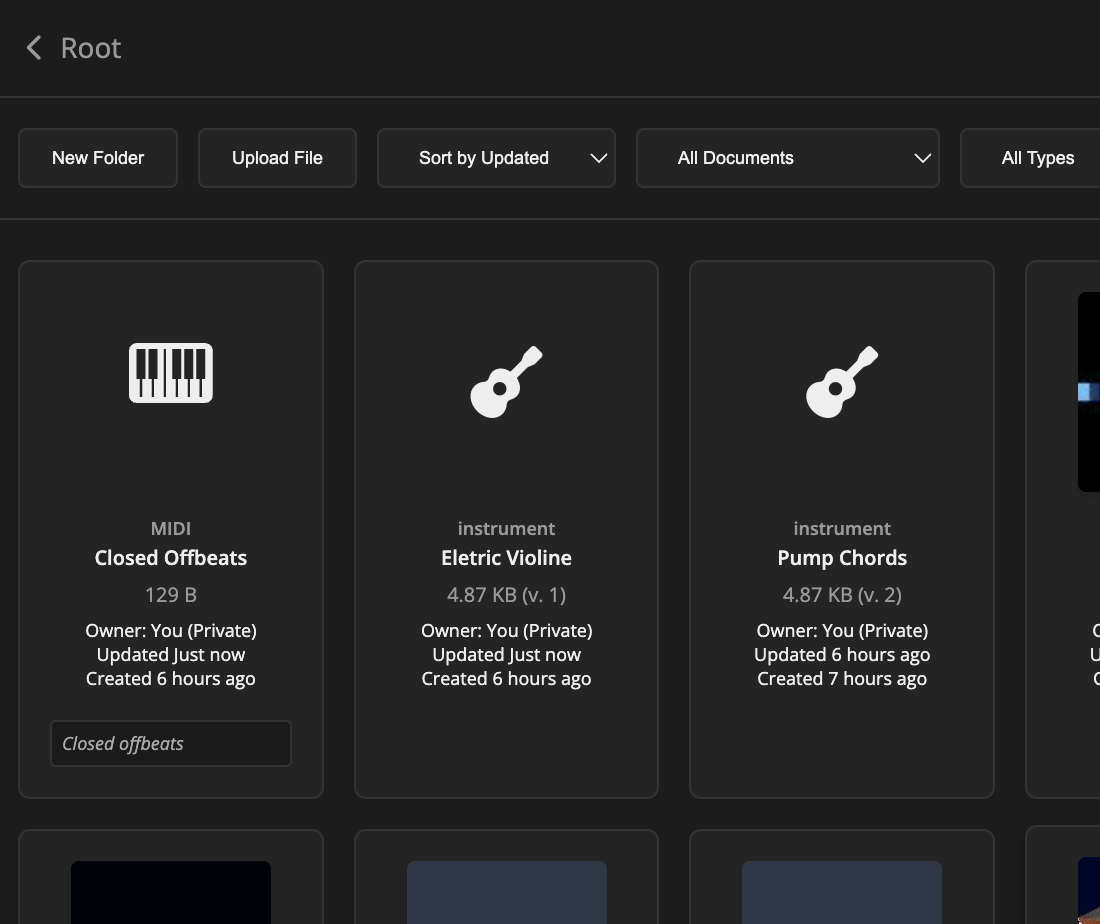
The storage commands for an instrument are in the burger menu of the instrument editor. The ones that apply to the instrument you are editing are shown:
- Save to My Files… – asks for a name, description, folder and visibility, and saves the instrument as a new file.
- Save New Version of “name” – if this instrument came from a file of yours, saves your changes as the next version of that same file.
- Save as New File… – saves it as a different file.
- Update from Storage… – fetches the current version of the file this instrument came from and replaces the instrument with it.
- Download Instrument – saves it to your computer as a file (the same file Upload… reads).
To use an instrument from storage, click Load… in the Instruments window, and pick it in the file window, which is already filtered to instruments. It works the same way for an instrument that someone made public or shared with you.
A Copy, Not a Link
When you add an instrument to a project, from the library, from a file, or from storage, the project gets its own copy. This is different from an image or a sound, which a project refers to. So:
- If you later change the stored file, projects that already use it are not changed.
- If you change the instrument in a project, the stored file is not changed until you save it.
- A project always works, whatever happens to the stored file, even if it is deleted or made private.
That is why Update from Storage… exists: it is how you choose to bring a project up to date with the file, and it tells you which version the project has and which version it would get. It replaces the instrument with the stored one, so changes you made to it in the project are lost.
A MIDI file behaves the same way: its notes are copied into the event when you use it.
Music and Pictures
The sound of every Music track can drive the visuals, exactly like an audio file. The Runsheet Track nodes in a shader can choose a Music track and read its waveform or frequencies, so shapes can pulse to your own drum pattern. A track that is set to Muted is still analyzed, so you can let a drum loop move the picture without hearing it.
Recording and Exporting
When you record a run, the Music events are included in the sound of the recording. Instruments are calculated in advance, note for note, as they sound live, so the recording sounds like what you heard while playing. See Recording in Runsheet and Project Settings.