Introduction
Before you start
Create an account
Create your free account with your sign-up code: Sign Up Here
Create a folder to store your projects
Open the VerkLabs storage directory here or click the home () button in the pop-out menu, then click New Folder and name it workshop.
Start a new project
- Create a new project by clicking the Start New Project button () at the top of the pop-out menu that slides out from the right.
- The grid is optional, and can be switched off in the Settings section (toggle Grid Helper to off position).
Create a single color box without shading
- Create a Box using the Add… drop down under 3D Objects in the pop-out menu.
- Open the Shader Editor by double clicking the 3D box in the Scene Viewer.
- Add a RGBA Color node by clicking the Add Node button at the top of the Shader Editor (in the node menu you find the RGBA Color node in the the RGBA section).
- Double click the node to open the shader editor form.
- Click the color button in the form to open the color selector.
- Select a color, then click OK, then close the node form editor.
- Connect the RGBA Color output to the RGBA Output by clicking and dragging the colored dot next to the rgba output on the right hand side of the RGBA Color node to the rgba input on the left hand side of the RGBA Output node.
Note how the color is applied to the box, but it’s flat, no shading. - You can drag the nodes to positions you like (to organize the Shader Editor workspace).
Box with a color but no shading
(source)Add shading
- Add a PBR Lighting node (from the RGBA section).
It’s a complex node, but we will leave all default values as is. - Connect the RGBA Color rgba output to the PBR Lighting rgba input.
- Connect the PBR Lighting rgba output to the RGBA Output rgba input.
Note how the color is applied to the box with shading. - Close the Shader Editor and use the scene viewer to look at the box from different angles.
Box with shading
(source)Map an asset onto the box
- Add an Image node (from the SOURCE DATA section).
- Double click it and pick an existing image asset, e.g. in the assets folder, or upload a new personal visual asset (a jpg/png image or small mpg video).
- Add a Texture Value node (from the SOURCE VALUE section), and connect your Image node to its texture input.
- Add an Alpha Blend node (from the MIXING & SELECTING section), and
- Connect the RGBA Color output to its base input.
- Connect the Texture Value output to its overlay input.
- Connect the Alpha Blend output to the PBR Lighting rgba input.
Note how the image only appears on the front side of the box. If your image includes any transparent areas, you can see the color from the RGBA Color in those areas.
Box with image on one side
(source)Map the asset to all six sides of the box
- Add a Box Mapping node (from the SOURCE VALUES section).
- Connect the Box Mapping uv output, to Texture Value uv input.
Box with image on all six sides
(source)Saving your project
The buttons at the top of the pop-out menu allow you to save and load projects.
- Before you save, click the button, and navigate to your folder. This will set it to be the current folder that your project is saved into. Close the Storage Directory.
- To save your project, you click the Save Project button . It will be save into the current directory. If the save fails it’s usually because you don’t have permission to write into the current directory. Change it by clicking and navigate to a folder you have created (or root).
- To clone your project under a new name, you click the Save As… button . It will prompt you for a new name. Your original project will remain unchanged.
- To open a project that’s been saved, click the Open Project button .
- To create a new project, click the New Project button .
- To see what directory is current, and what documents are in it, click the Open Storage Directory button .
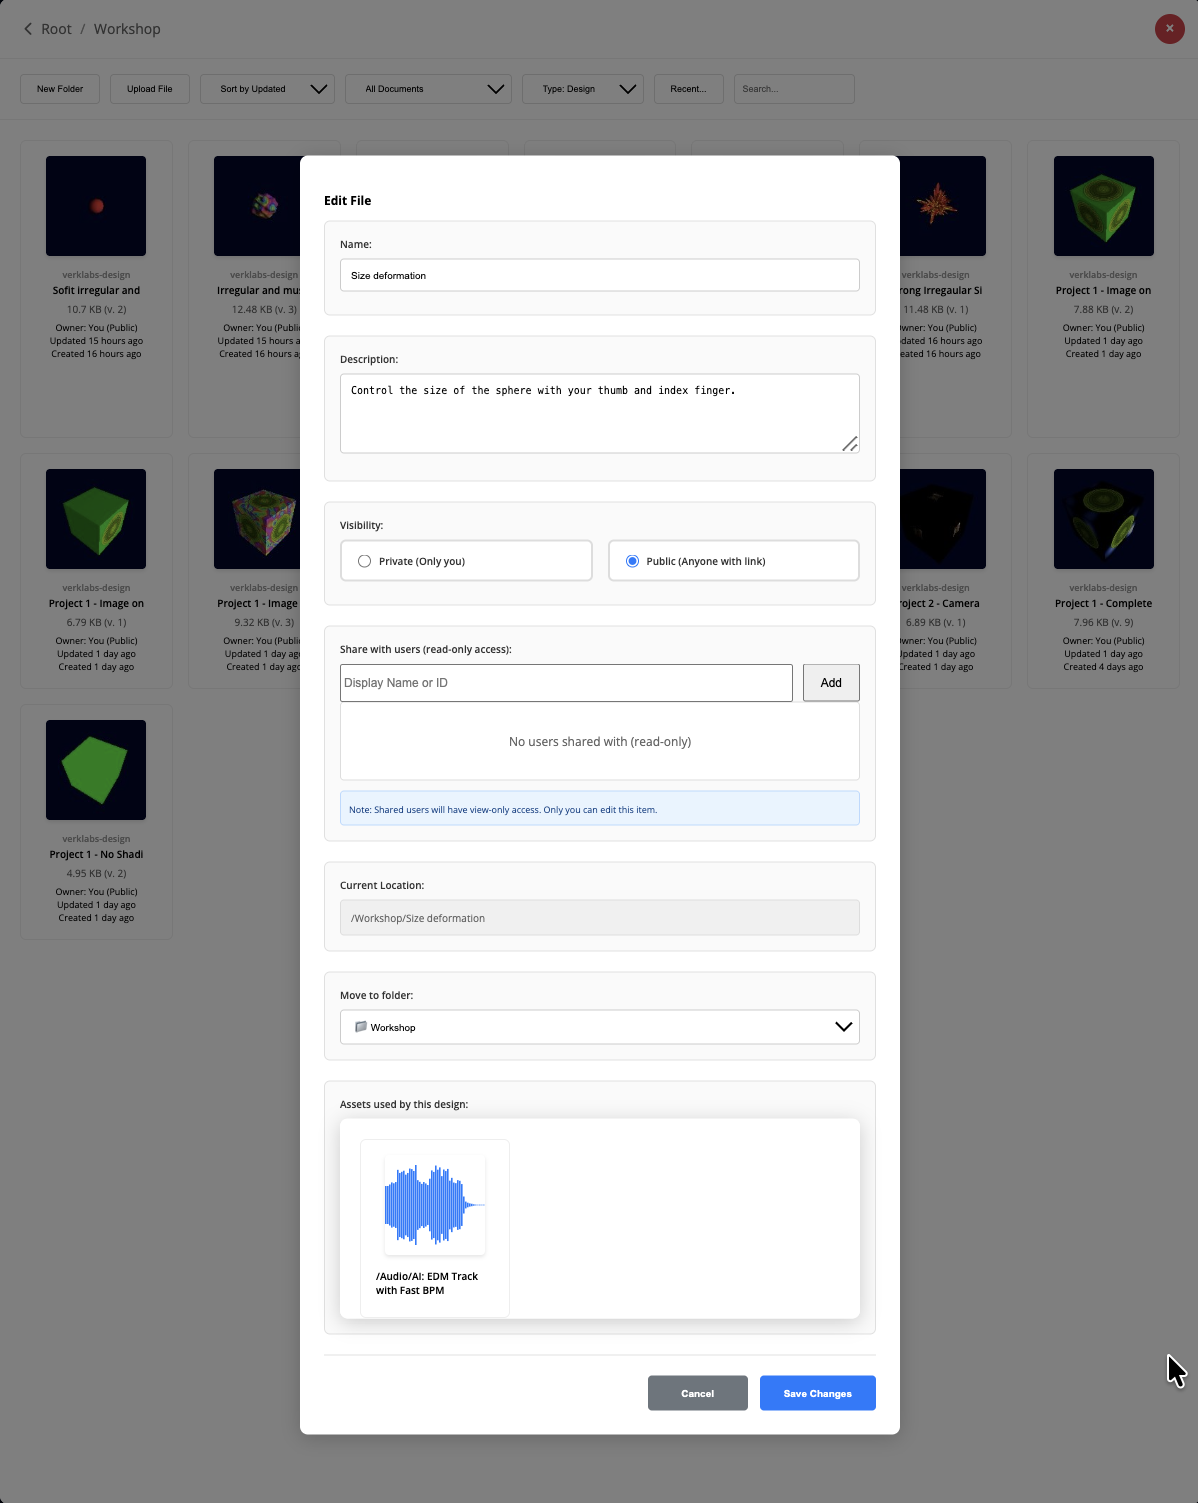
If you click the name of the project at the very top, you’ll get a pop-up that allows you to read and update the project file properties, including where it is stored.
Sharing your project
You can share your project using the Share Project button . It’ll give you a URL you can share with anyone. The URL will bring up a view only version of your project, where it can not be edited or saved.
Before you share a project, make sure that it, and all its assets, are marked as public. If they are not, you will get an error message when you try to share. To mark a project or an asset as public, find it in the Storage Directory, then click the EDIT button that appears when you hover over it. To change the currently loaded project you can simply click on its name at the top of the pop-out menu.